Most people that are fond of Windows operating system will always root for graphical desktop applications (GUI) over command line (CLI) programs. Since after DOS, windows operating systems have been known to use simple and user friendly GUI. This is one of the reasons why they have made a lot of customers around the world.

Apple computers have also had wonderful GUI but their product prices still limits their products to those with more funds. There’s always an argument on Microsoft stealing the GUI concept from Apple but as much as I’m not a big Microsoft fan, I never agreed to that. Xerox started it, Apple found it, then Microsoft found it. You may say Microsoft stole from Apple what they had stolen from Xerox. I wouldn’t want to have the argument here. If you aren’t familiar with these stories, you should read the history.
Most programmers I’ve seen from various languages usually start with CLI programs besides web developers. We are in a world where everyone wants a graphical interface for everything and then we choose to make programs that are CLI based. Since Microsoft is fully GUI oriented, its programming languages allow you easily build GUI programs. I once developed with Visual Basic 8 and Visual Basic.NET in Visual Studio 2008, 2011. It was very easy and interesting building what I needed on those platforms but I just totally got tired of being a Windows developer and I abandoned them ever since.
I chose the Python path now as I’m still interested in building GUI programs and I will work you through GUI development as I’ve had my adventure in it so far.
In Python, there are 4 modules you can use to build GUI programs and they are
- Tkinter (Ships with Python)
- wxPython
- PyGTK
- pyQT
I started out with Tkinter since it shipped with my python installation while I was on a Windows operating system. This tutorial helped me http://sebsauvage.net/python/gui/. As soon as I got to do my first Tkinter program, I went ahead to do the wxpython program. At this point, I knew what it felt like to build a GUI but I didn’t fully understand how to handle signals and slots. I only used samples from sites and my GUI programs didn’t have enough objects and enough actions in them.
After some reading, I decided to go with pyQt. I never tried pyGTK till date so I have less to say about it. I wrote my first pyQt4 program this way:
# Code Example: Display a window in PyQt4
# Python 2.6 with PyQt 4
import sys
from PyQt4 import QtGui
class MainFrame(QtGui.QMainWindow):
    def __init__(self):
        QtGui.QMainWindow.__init__(self)
        self.setWindowTitle("Window title") # title
        self.resize(1024, 768) # size
        self.setMinimumSize(800, 600) # minimum size
        self.move(0, 0) # position window frame at top left

if __name__ == "__main__":
    app = QtGui.QApplication(sys.argv)
    frame = MainFrame()
    frame.show()

    exit_code = app.exec_()
    sys.exit(exit_code)
The comments explain what each part of the code does. This is just a blank window frame with no objects in it. After this, I found this code for creating shapes within a canvas in a frame
# Code Example: Display a window with a button, icon and canvas in PyQt4
# Python 2.7 with PyQt 4
# This example build on the last one by adding a button, changing the
# window icon, and adding a canvas where we can draw some shapes.
import sys
from PyQt4 import QtGui, QtCore
class MainFrame(QtGui.QMainWindow):
    def __init__(self):
        QtGui.QMainWindow.__init__(self)
        self.setWindowTitle("Window title") # title
        self.resize(1024, 768) # size
        self.setMinimumSize(800, 600) # minimum size
        self.move(0, 0) # position window frame at top left
        # Adding the icon:
        self.setWindowIcon(QtGui.QIcon("myicon.png"))
       # Set the central widget for the main window
        cwidget = QtGui.QWidget(self)
        # Set up a layout for the button and canvas:
        layout = QtGui.QVBoxLayout() #vertical box layout
        #layout = QtGui.QHBoxLayout() #horizontal box layout
        self.add_button(layout)
        self.add_canvas(layout)
        cwidget.setLayout(layout)
        self.setCentralWidget(cwidget)
        # Now set up the shapes that we draw on each button click
        # get the button back from the layout
        button = layout.itemAt(0).widget()

        # Create objects used for drawing
        sol_pen =  QtGui.QPen(QtGui.QColor("black"))

        dot_pen =  QtGui.QPen(QtGui.QColor("black"))
        dot_pen.setStyle(QtCore.Qt.DotLine)
        dash_pen = QtGui.QPen(QtGui.QColor("black"))
        dash_pen.setStyle(QtCore.Qt.DashLine)

        r_brush = QtGui.QBrush(QtGui.QColor("red"))
        g_brush = QtGui.QBrush(QtGui.QColor("green"))
        b_brush = QtGui.QBrush(QtGui.QColor("blue"))
        triangle = QtGui.QPolygonF()
        triangle.append(QtCore.QPointF(100, 50))
        triangle.append(QtCore.QPointF(200, 200))
        triangle.append(QtCore.QPointF(0, 200))
        self.scene_data = []
        # add data for drawing circle
        #self.scene.addEllipse(0, 0, 150, 150, sol_pen, r_brush) #x, y, w, h etc
        self.scene_data.append({'routine':self.scene.addEllipse,
                                'args':(0,0,150,150,sol_pen,r_brush),
                                'z': 0, #z-index
                                'next': "Draw Rectangle"})
        # add data for drawing square
        #self.scene.addRect(100, 100, 150, 150, dot_pen, g_brush) #x, y, w, h etc
        self.scene_data.append({'routine':self.scene.addRect,
                                'args':(100,100,150,150, dot_pen, g_brush),
                                'z':1,
                                'next': "Draw Triangle."})
        # add data for drawing triangle
        #self.scene.addPolygon(triangle, dash_pen, b_brush)
        self.scene_data.append({'routine':self.scene.addPolygon,
                                'z':2,
                                'args':(triangle, dash_pen, b_brush)})
        # Set up self.draw_next_item to fire when button is clicked.
        self.connect(button, QtCore.SIGNAL("clicked()"), self.draw_next_item)

    def add_button(self, layout):
        """Create a button and then add it to the layout."""
        button = QtGui.QPushButton("Draw Circle")
        layout.addWidget(button)
    def add_canvas(self, layout):
        """Create a canvas and then add it to the layout."""
        canvas = QtGui.QGraphicsView()
        layout.addWidget(canvas)
        # Now create a graphics scene to draw shapes to.
        # Now remember to keep a reference to GraphicsScene for as long as
        # you're using it, because unlike widgets, these are automatically
        # destroyed when they lose reference count
        self.scene = QtGui.QGraphicsScene()
        canvas.setScene(self.scene)
    def draw_next_item(self):
        # get the button. could've just saved as self.button, but I wanted to
        # show how it could be done this way
        button = self.centralWidget().layout().itemAt(0).widget()
        d = self.scene_data.pop(0) # get first item
        item = d['routine'](*d['args']) # just a little python magic
        item.setZValue(d['z'])
        if len(self.scene_data):
            # more stuff to draw, set button label
            button.setText(d['next'])
        else:
            # no more left, disable button
            button.setText("No more shapes!")
            button.setDisabled(True)


if __name__ == "__main__":
    app = QtGui.QApplication(sys.argv)
    frame = MainFrame()
    frame.show()

    exit_code = app.exec_()
    sys.exit(exit_code)
The button object here was sending signals to change the shapes in the canvas. This was my first experience working with signals and slots. It’s like a simple jQuery where we have two objects in the DOM being selected.
$('#signal').click(function(){
  $('.receiver').html('This is my slot');
});
// Pure JS
document.getElementById('signal').onclick = function(){
 document.querySelectorAll('.receiver').innerHTML = 'This is my slot';
}
That’s my interpretation in jQuery of handling signals and slots as I have demonstrated them with their related class names.
Writing GUI code can take a lot of time and can be really stressful. This is one of the reasons why I enjoy Qt because it has QtDesigner. It reminds me of my days with Visual Basic as it has a simple environment for you to just pick GUI components and drop on your frame. It’s a good toolkit to build GUI programs in few minutes. Here’s my Qt designer
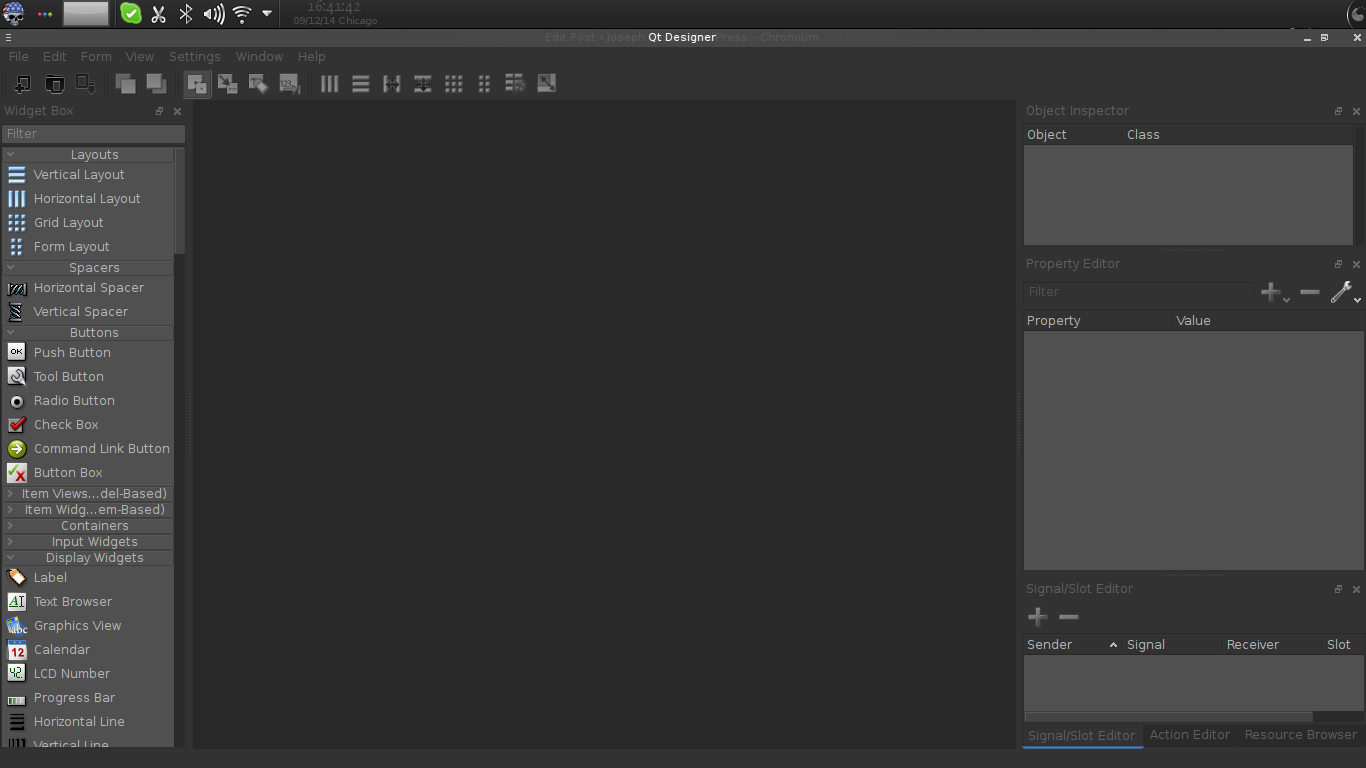
I designed the UI for my KDE desktop to be dark because I love dark UI so it it may not be such a dark UI in your case. The panes on the left are objects/widgets you can drop on your frame. On the right, we have property editor, signal/slot editor where you can set signals for some slots while designing the UI from the designer. For some signals, I prefer to manually attach them to their slots by writing my python code.
Qtdesigner produces user interface files in .ui extension. This ui files are in XML format. Here’s a short sample of its output
<?xml version="1.0" encoding="UTF-8"?>
<ui version="4.0">
 <author>Joseph Rex</author>
 <class>MainWindow</class>
 <widget class="QMainWindow" name="MainWindow">
  <property name="geometry">
   <rect>
    <x>0</x>
    <y>0</y>
    <width>749</width>
    <height>518</height>
   </rect>
  </property>
 </widget>
</ui>
We can work with these XML files directly to build our GUI but I wouldn’t recommend that. It’s best to turn this into a python code we can work with. Qtdesigner is built for C++ so C++ programmers can simply click Form > View Code to see the cpp code generated. For Python developers we use a UI compiler program (pyuic). I use pyuic4 so compiling a UI program is this way for me:
pyuic4 guiprogram.ui -o guiprogram.py
You can’t just run this generated program to load up your GUI program. To use the generated code, see the docs
Now you’re up and running. To wrap this all up, let’s create a simple GUI with an input box (QTextEdit), a button (QPushButton), and a label (QLabel). This program will take contents of the input and display in the label field after the button is clicked.
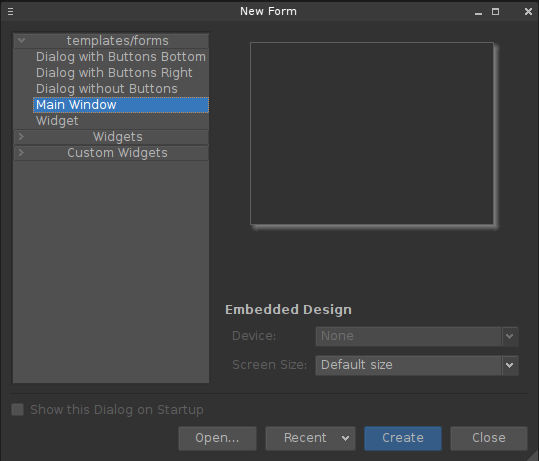
I started by creating a new Main Window from the QtDesigner templates
Next things will be to set the width, height, and geometry (location of the window by XY axis on screen). Also, we have to take note of the objectName because it is the way we call our objects in the program. This is done in the property edior
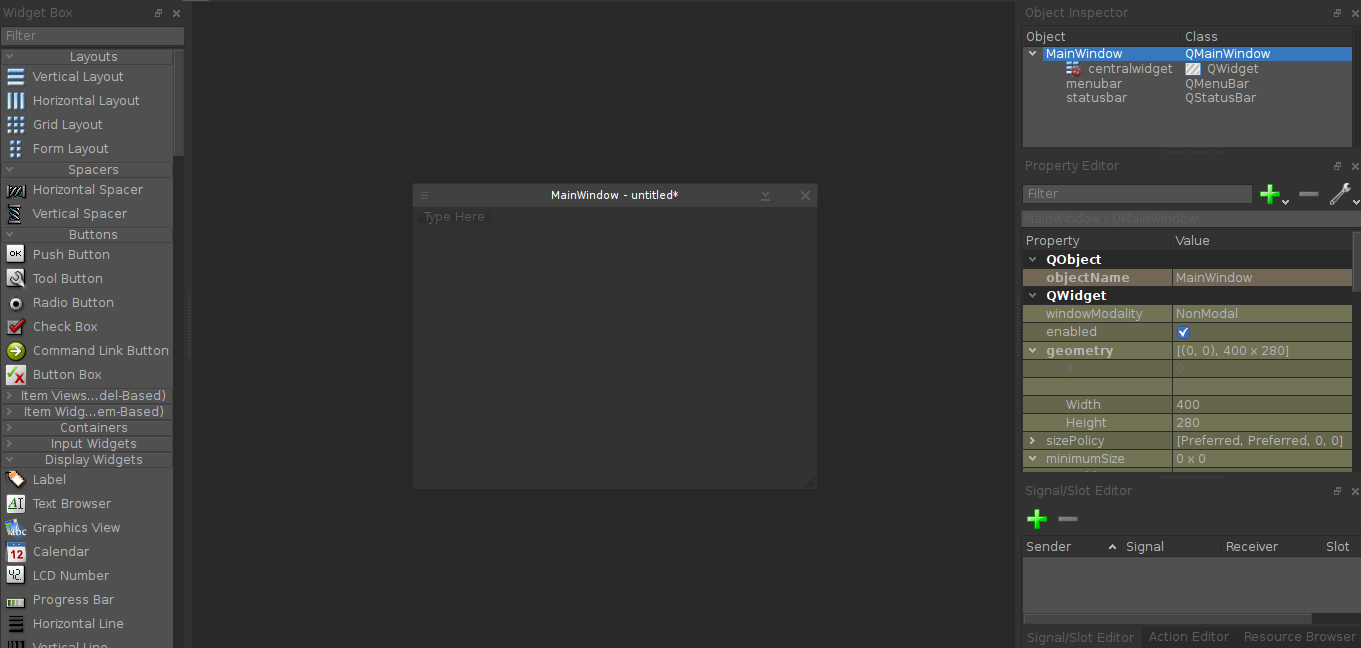
You can see my objectName is MainWindow and I have chosen to use a window of size 400 x 280. I want it at the extreme top right so my geometry is (0,0) which stands for x-axis = 0, y-axis = 0.
I could create my signal and slots right away from the designer like so:
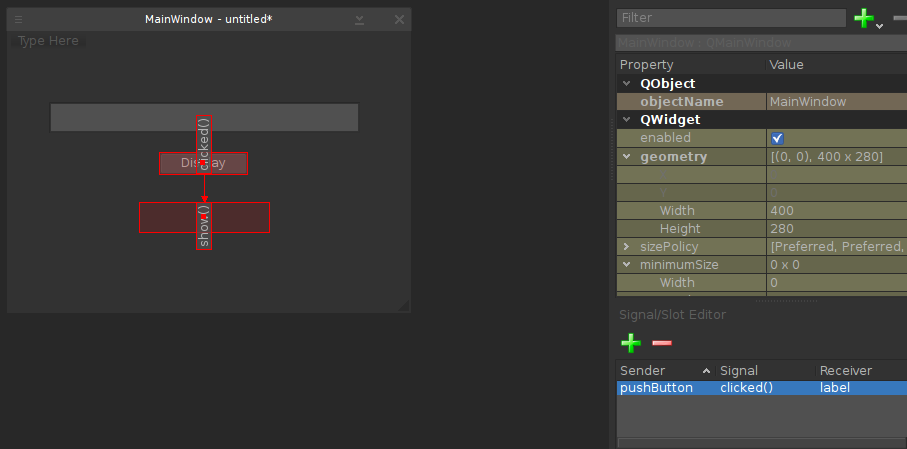
As you can see the signal/slot editor has the names of each object. and the view for the signals/slot editor shows there’s a relationship between the display button and the label below. I will just delete this slot to handle this part with my code because I have less options from the designer. I saved my design as example.ui and I’m compiling to python code with:
pyuic4 example.ui -o ui_example.py
Now I have this generated python code:
# -*- coding: utf-8 -*-

# Form implementation generated from reading ui file 'example.ui'
#
# Created: Fri Sep 12 17:44:41 2014
#      by: PyQt4 UI code generator 4.9.3
#
# WARNING! All changes made in this file will be lost!

from PyQt4 import QtCore, QtGui

try:
    _fromUtf8 = QtCore.QString.fromUtf8
except AttributeError:
    _fromUtf8 = lambda s: s

class Ui_MainWindow(object):
    def setupUi(self, MainWindow):
        MainWindow.setObjectName(_fromUtf8("MainWindow"))
        MainWindow.resize(400, 280)
        self.centralwidget = QtGui.QWidget(MainWindow)
        self.centralwidget.setObjectName(_fromUtf8("centralwidget"))
        self.label = QtGui.QLabel(self.centralwidget)
        self.label.setGeometry(QtCore.QRect(130, 150, 131, 31))
        self.label.setFrameShape(QtGui.QFrame.Box)
        self.label.setText(_fromUtf8(""))
        self.label.setObjectName(_fromUtf8("label"))
        self.textEdit = QtGui.QTextEdit(self.centralwidget)
        self.textEdit.setGeometry(QtCore.QRect(40, 50, 311, 31))
        self.textEdit.setObjectName(_fromUtf8("textEdit"))
        self.pushButton = QtGui.QPushButton(self.centralwidget)
        self.pushButton.setGeometry(QtCore.QRect(150, 100, 89, 23))
        self.pushButton.setObjectName(_fromUtf8("pushButton"))
        MainWindow.setCentralWidget(self.centralwidget)
        self.menubar = QtGui.QMenuBar(MainWindow)
        self.menubar.setGeometry(QtCore.QRect(0, 0, 400, 21))
        self.menubar.setObjectName(_fromUtf8("menubar"))
        MainWindow.setMenuBar(self.menubar)
        self.statusbar = QtGui.QStatusBar(MainWindow)
        self.statusbar.setObjectName(_fromUtf8("statusbar"))
        MainWindow.setStatusBar(self.statusbar)

        self.retranslateUi(MainWindow)
        QtCore.QMetaObject.connectSlotsByName(MainWindow)

    def retranslateUi(self, MainWindow):
        MainWindow.setWindowTitle(QtGui.QApplication.translate("MainWindow", "MainWindow", None, QtGui.QApplication.UnicodeUTF8))
        self.pushButton.setText(QtGui.QApplication.translate("MainWindow", "Display", None, QtGui.QApplication.UnicodeUTF8))
The name of the window object in the designer is “MainWindow” so the class name in the generated code is Ui_MainWindow based on that. Following the docs on using generated code, I imported this in my major program
import sys
from PyQt4 import QtGui, QtCore
from ui_example import Ui_MainWindow

class Main(QtGui.QMainWindow):
	def __init__(self):
		QtGui.QMainWindow.__init__(self)
		self.ui = Ui_MainWindow()
		self.ui.setupUi(self)

if __name__ == '__main__':
	app = QtGui.QApplication(sys.argv)
	window = Main()
	window.show()
	sys.exit(app.exec_())
Now the signals. We have three objects on this frame. Let’s rehash them but this time with the names we’ve given them in the program.
- QTextEdit = textEdit
- QPushButton = pushButton
- QLabel = label
You can see I’ve used default names to make things easier but you can make it different in your case. QPushButton sends a signal, QLabel receives it and picks the content of QTextEdit to display in itself as a slot. I’ll amend my code to perform my function
import sys
from PyQt4 import QtGui, QtCore
from ui_example import Ui_MainWindow
class Main(QtGui.QMainWindow):
def __init__(self):
QtGui.QMainWindow.__init__(self)
self.ui = Ui_MainWindow()
self.ui.setupUi(self)
self.ui.pushButton.clicked.connect(self.displayText)
def displayText(self):
userInput = self.ui.textEdit.toPlainText()
self.ui.label.setText(userInput)
if __name__ == '__main__':
app = QtGui.QApplication(sys.argv)
window = Main()
window.show()
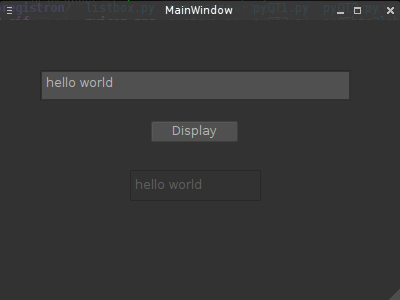
sys.exit(app.exec_())and voila! It works. See it in action after running “python example.py”
Conclusion:
Building GUI programs may be a challenge but as the world evolves, it is very necessary. You should also not directly use generated code from pyuic because you may want to make changes to the UI at any point. Each compilation with pyuic will make you lose your changes you’ve made on the generated code. I’ve chosen Qt as my best module for building GUI. You may choose something else that works for you but from what I hear, Tkinter has a lot of downsides so it’s not recommended.